How to create a production-ready Nest Js Docker Container With A Minimal Size
What Is Docker
Docker is an open-source platform for automating applications' deployment, scaling, and management as containers. Containers are isolated, lightweight environments that enable applications to run consistently across different infrastructure environments.
With Docker, you can package an application and its dependencies in a single container image, allowing it to run on any system with Docker installed. This makes it easier to develop, test, and deploy applications and run multiple applications on the same system without them interfering with each other.
Overall, Docker is a popular tool for developing, shipping, and running applications, enabling consistent and reproducible software development and deployment environments.
How to reduce the size in the nest js docker container with the different stages?
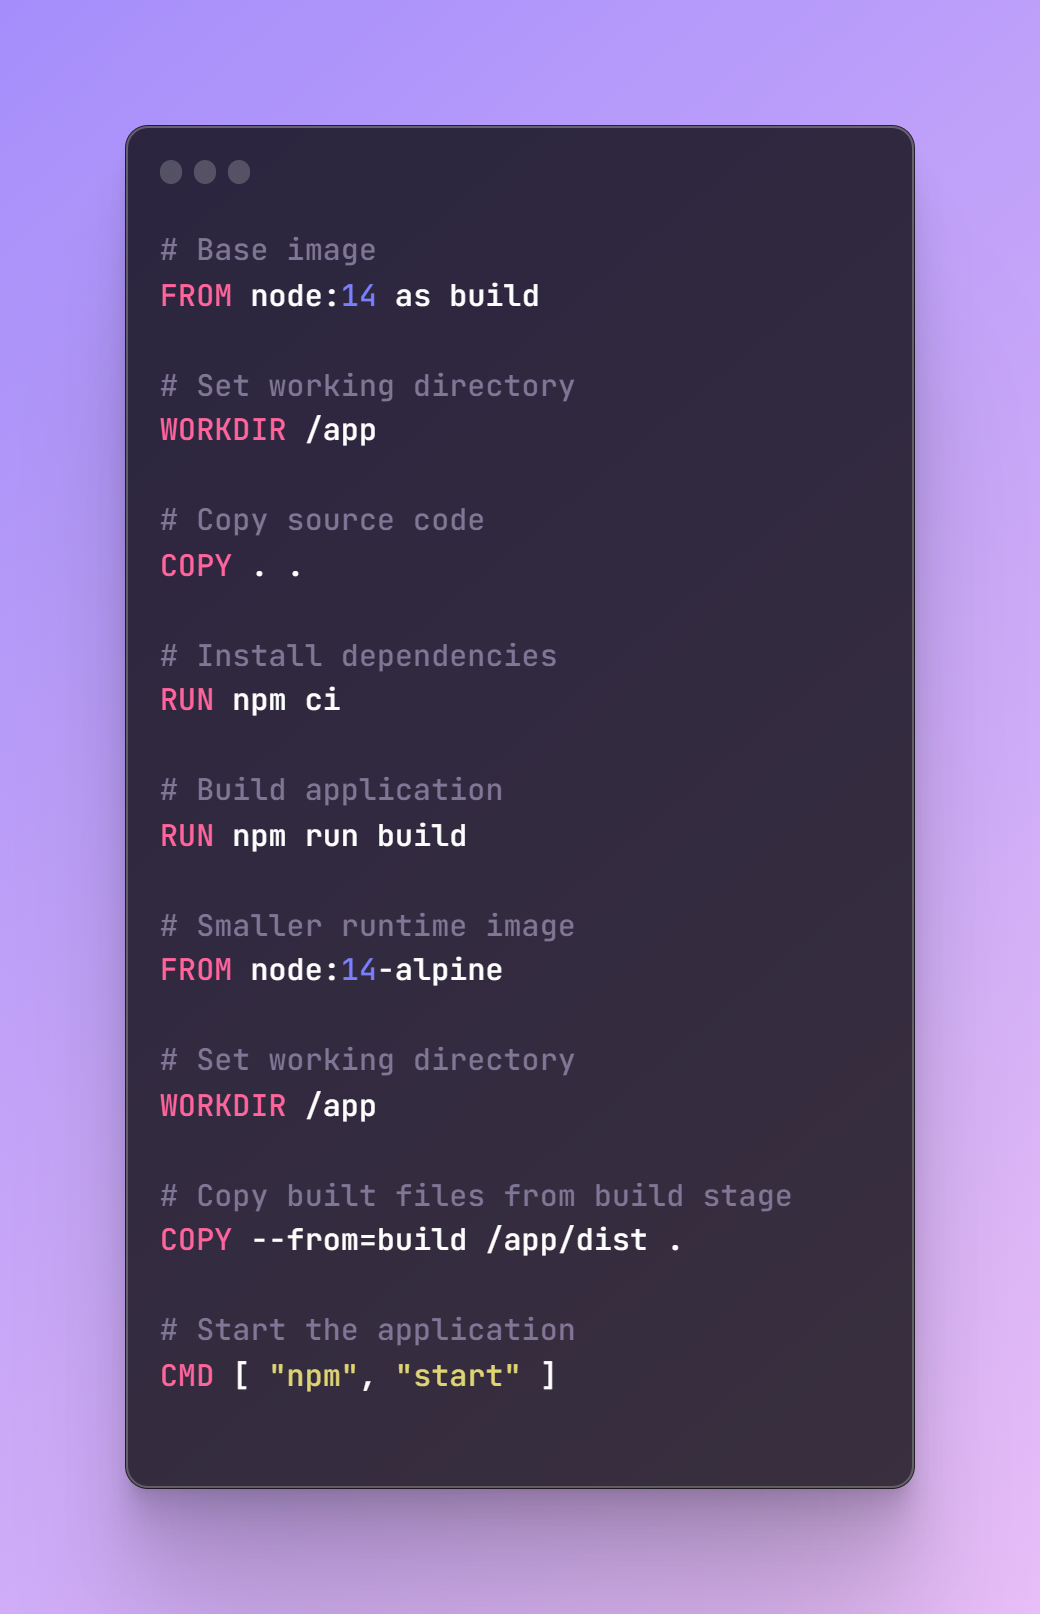
Reducing the size of a Nest.js Docker container can be achieved through a multi-stage build process, which allows you to only include the necessary components in the final image.
Here's a general outline of how you can implement a multi-stage build for a Nest.js application in Docker:
-
Start with a base image: Use the Node.js image as the base image for your Docker container, as this provides a pre-installed environment for running Node.js applications.
-
Build the application in a separate stage: In the first stage, you can use the base image to build your Nest.js application. This stage will compile your TypeScript code into JavaScript and install all of the required dependencies. You can then copy the built files to a separate, intermediate image for use in the next stage.
-
Copy the built files to a smaller runtime image: In the second stage, you can use a smaller runtime image, such as Alpine Linux, as the base image. This image will only include the necessary components to run the application, such as Node.js and the required libraries, without the development dependencies. In this stage, you can copy the built files from the previous stage into the runtime image.
-
Run the application in the final image: The final image will contain only the necessary components to run your application, reducing its size compared to the original base image.
Here's an example of a multi-stage build for a Nest.js application in Docker:
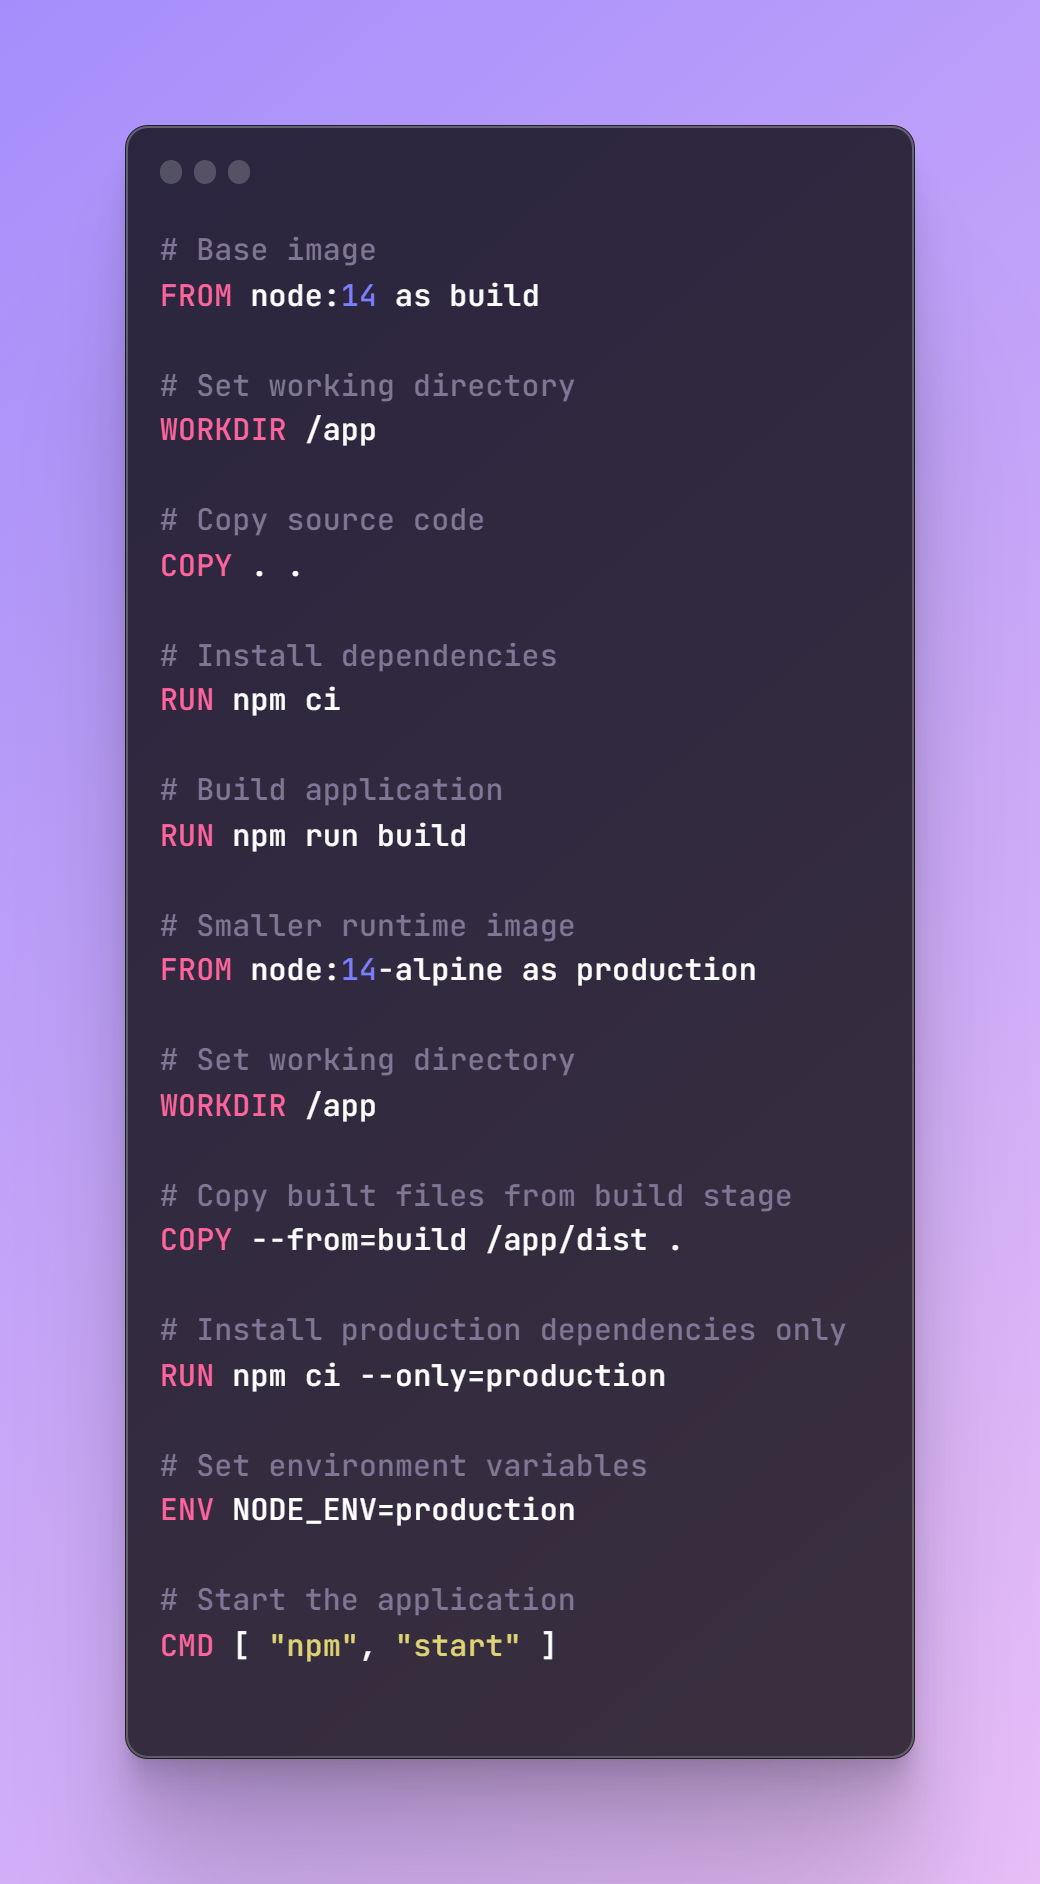
Now Let's See How We Can Create This Docker For Production Application
In this example, the NODE_ENV environment variable is set to production to indicate that the application is running in a production environment. This can be used by your application to load production-specific configurations, such as database connections, API keys, and other sensitive information.
Additionally, only the production dependencies are installed in the runtime image to reduce the size of the final image and improve performance.
By following this multi-stage build process, you can create a production-ready Docker container for your Nest.js application that is optimized for performance and security, making it easier to deploy and manage in a production environment.
This is only to get an idea about how to reduce the docker size in the production build. I am not mentioning the export port and other things If you want know about everything. Just comment below.


