
Scaling (Multiple Instances) Your AWS Deployment with a Load Balancer
In our previous article, we explored the deployment of a single instance of our application using the Elastic Container Service (ECS). Now, let's take a deeper dive into our deployment strategy by scaling horizontally and efficiently distributing traffic using a load balancer.
While your application may perform well on most regular days, there are occasions, such as high-traffic events, when we anticipate a surge in users. In such cases, traditional vertical scaling by upgrading server resources with faster CPUs or more memory can be challenging and often leads to downtime.
Instead, we can adopt a horizontal scaling approach. This involves running multiple instances of our application and dividing the workload among them. Horizontal scaling offers several advantages. Firstly, it is a seamless process that doesn't disrupt service. Secondly, it provides fault tolerance, ensuring that if one instance encounters issues, traffic can be directed to the remaining instances, ensuring uninterrupted service availability.
Setting Up Security Groups
In our previous article, we made adjustments to the default security groups to enable incoming traffic for our application instance. Now, we'll take a step further by creating two new security groups from scratch.
Creating a Security Group for the Load Balancer
When utilizing a load balancer, clients seeking access to our API don't establish a direct connection with a specific application instance. Instead, they interact with the load balancer, which acts as an intermediary, routing requests to one of the application instances.
To ensure the seamless operation of our load balancer, we must define the appropriate security group rules for accepting incoming traffic. To create a fresh security group, navigate to the EC2 panel and locate the "Security Groups" option in the left sidebar under the "Network & Security" category.
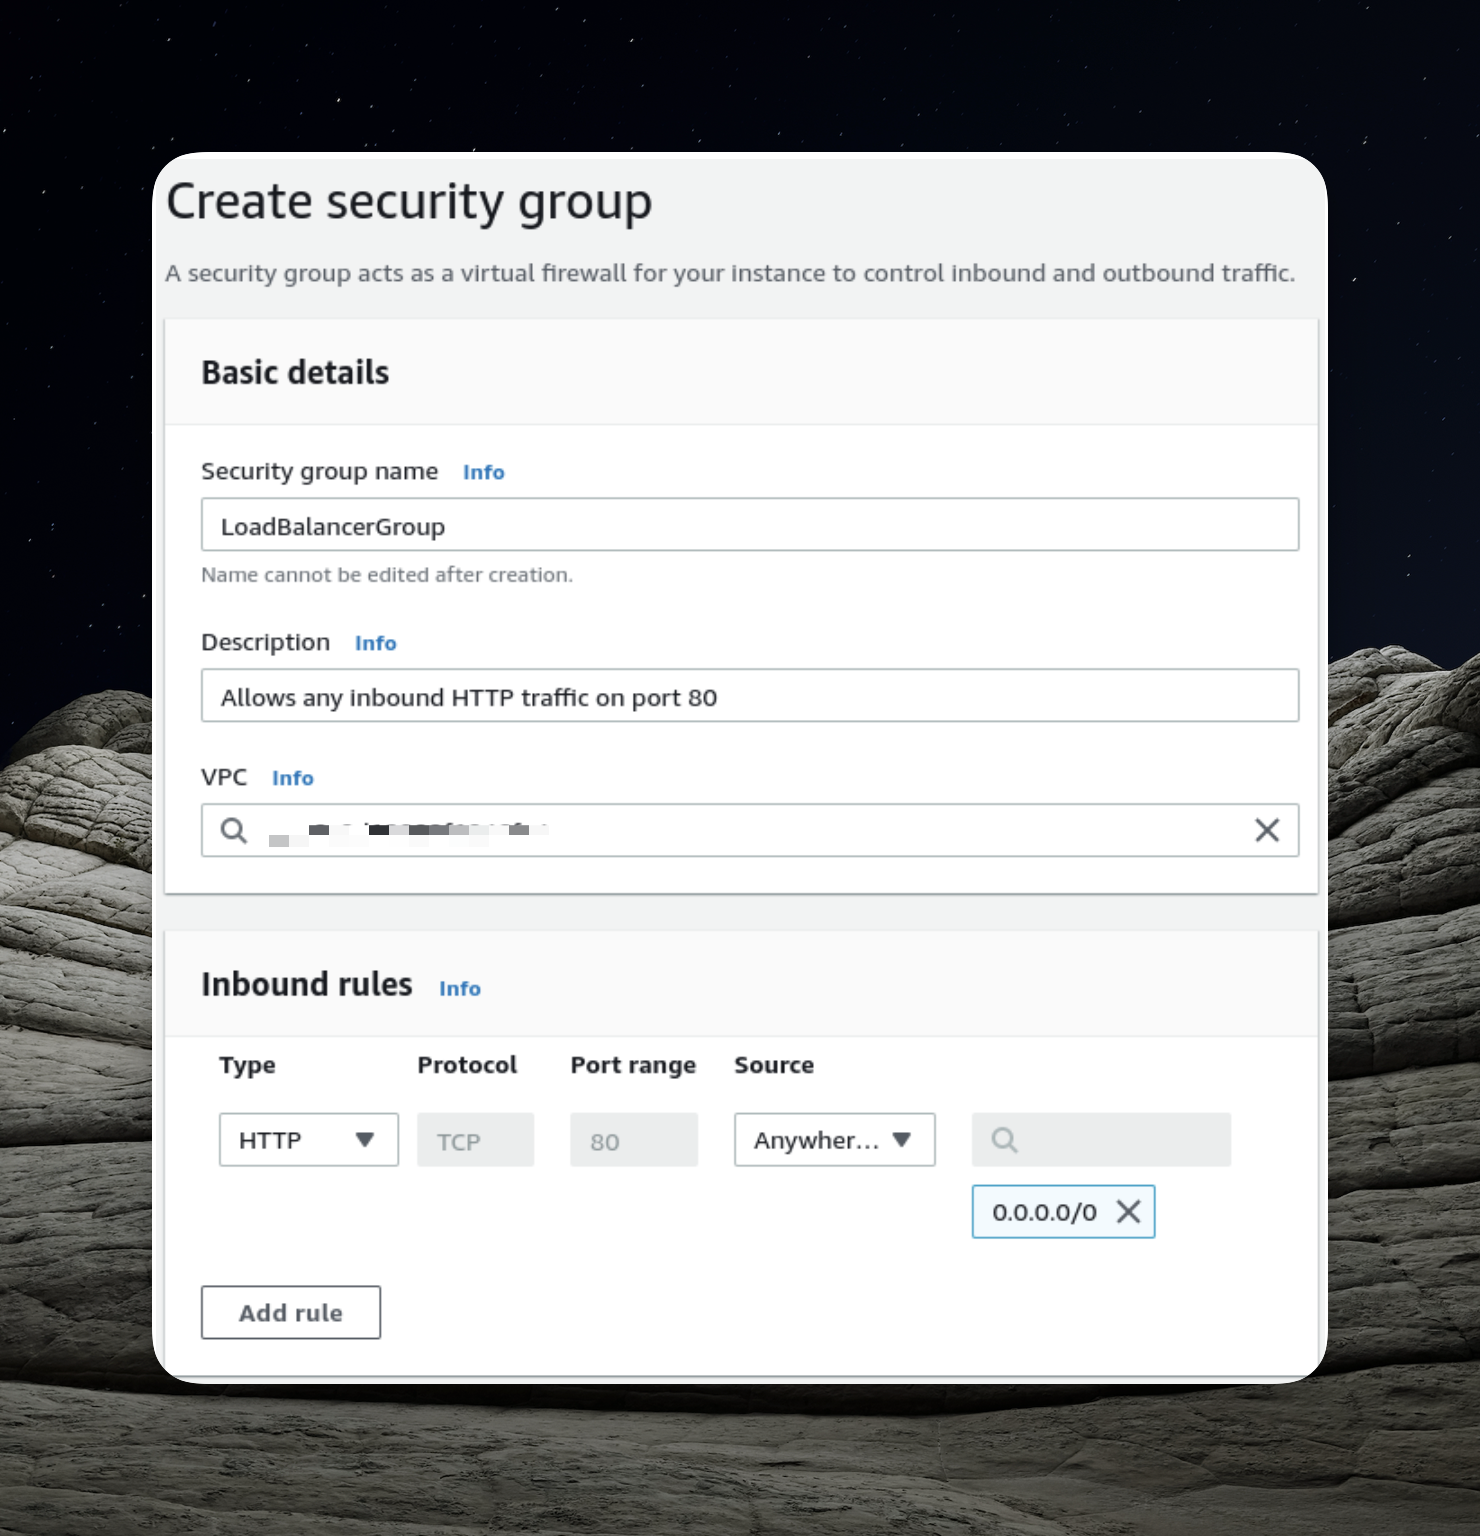
In the context of our security group setup, a critical step involves adding an inbound rule that permits incoming HTTP traffic on port 80 from external sources.
Security Group for EC2 Containers
As users direct their requests to our load balancer, the load balancer becomes the gateway responsible for forwarding these requests to our application running within the EC2 instances. To facilitate this communication seamlessly, we must explicitly grant permission for the load balancer to interact with our application. To achieve this, we will establish a distinct security group dedicated to this purpose.

An essential aspect of the configuration mentioned above is enabling incoming traffic from the load balancer. This is achieved by specifying the previously created security group as the source for inbound traffic.
Setting Up the ECS Cluster
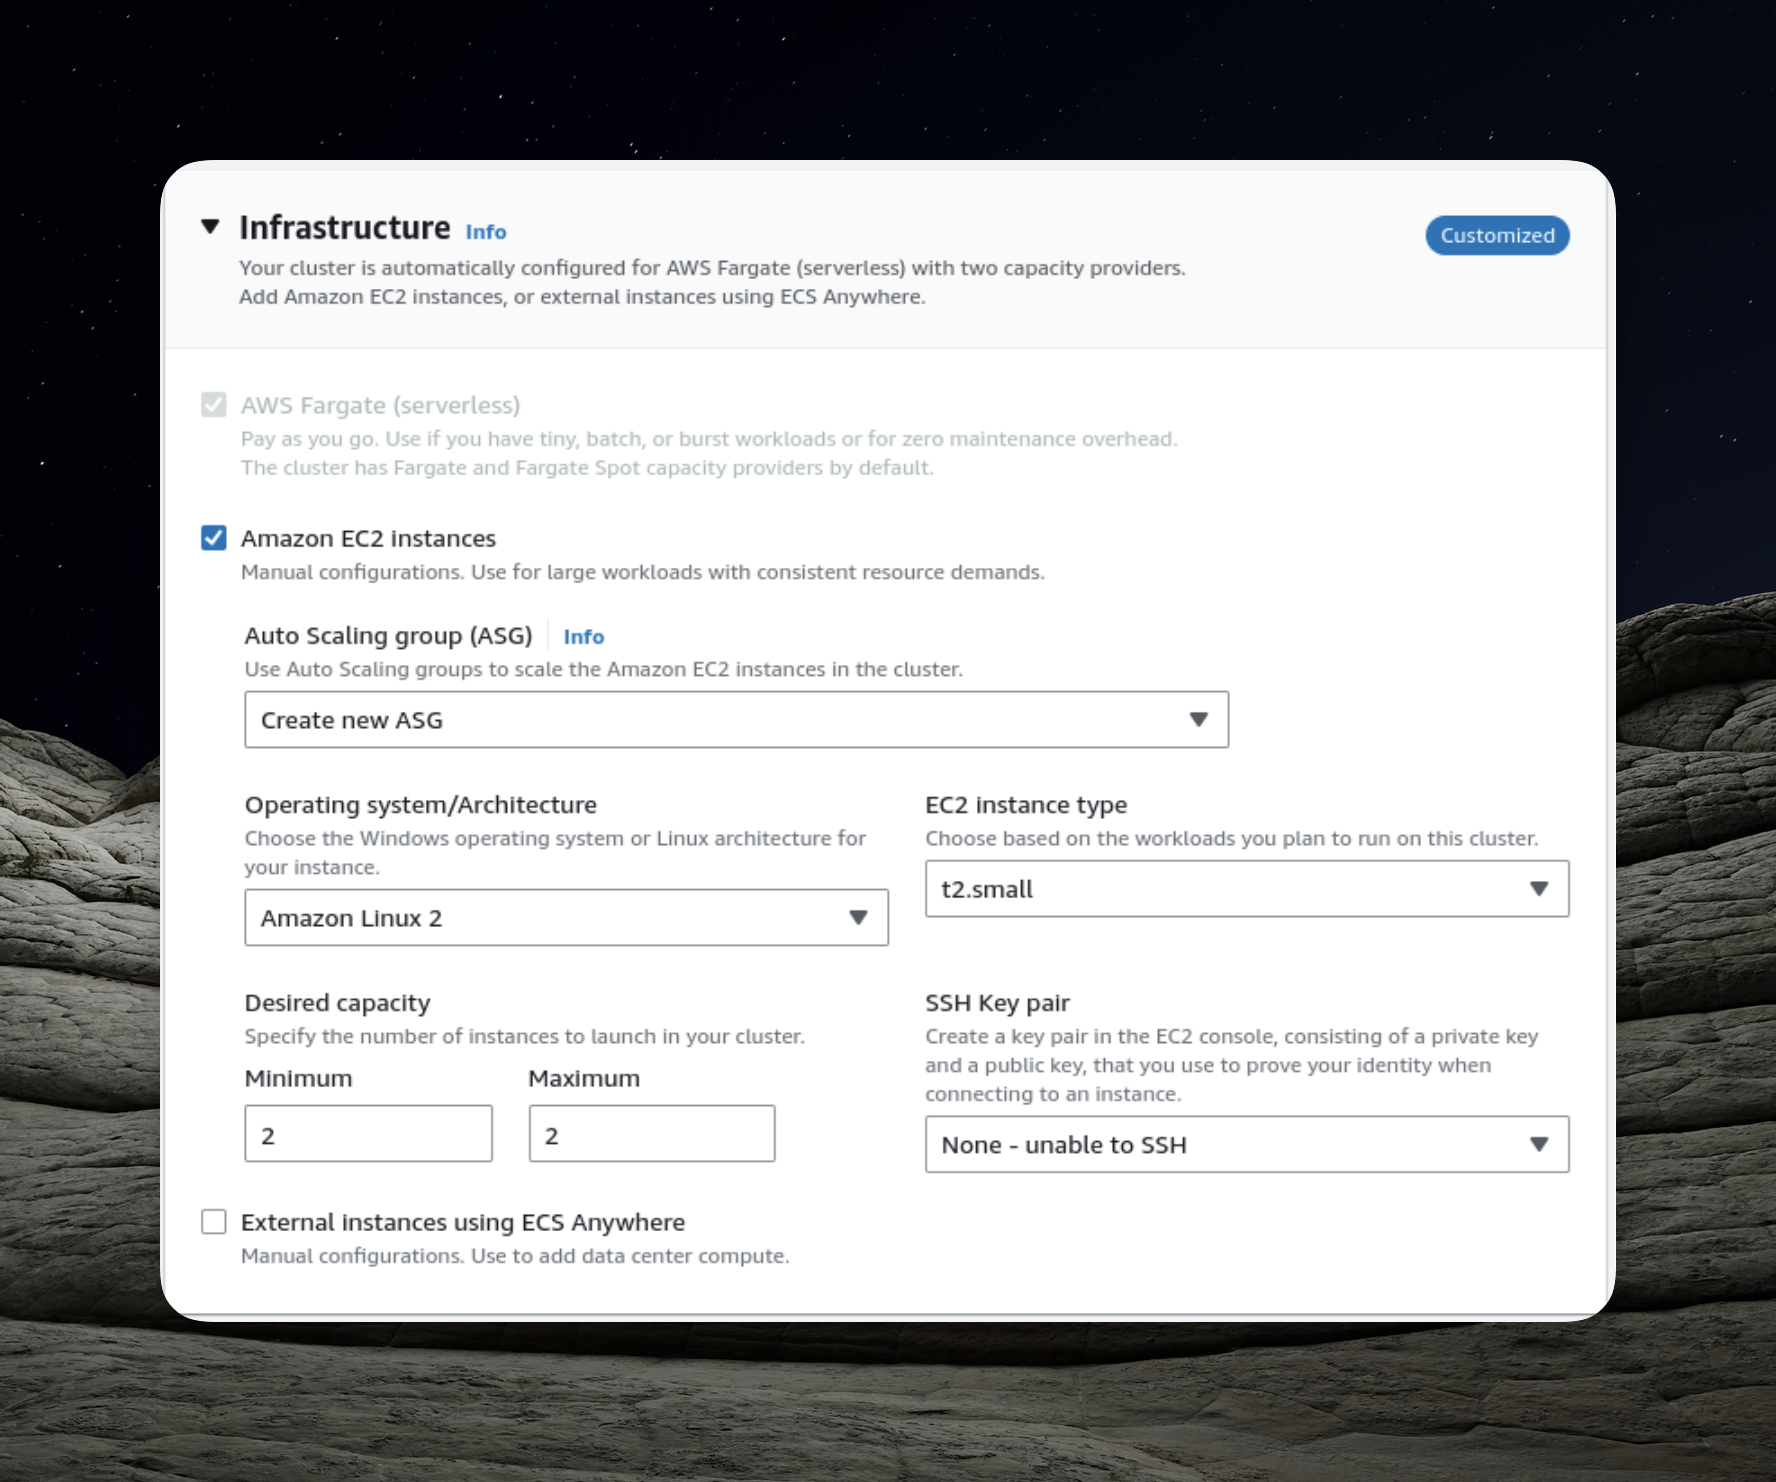
In order to proceed with the following steps, it's essential to have our ECS (Elastic Container Service) cluster ready. Let's go ahead and create it.

The pivotal aspect of configuring the ECS cluster is defining the number of instances, and in this case, we'll opt for simplicity by setting it to two instances.
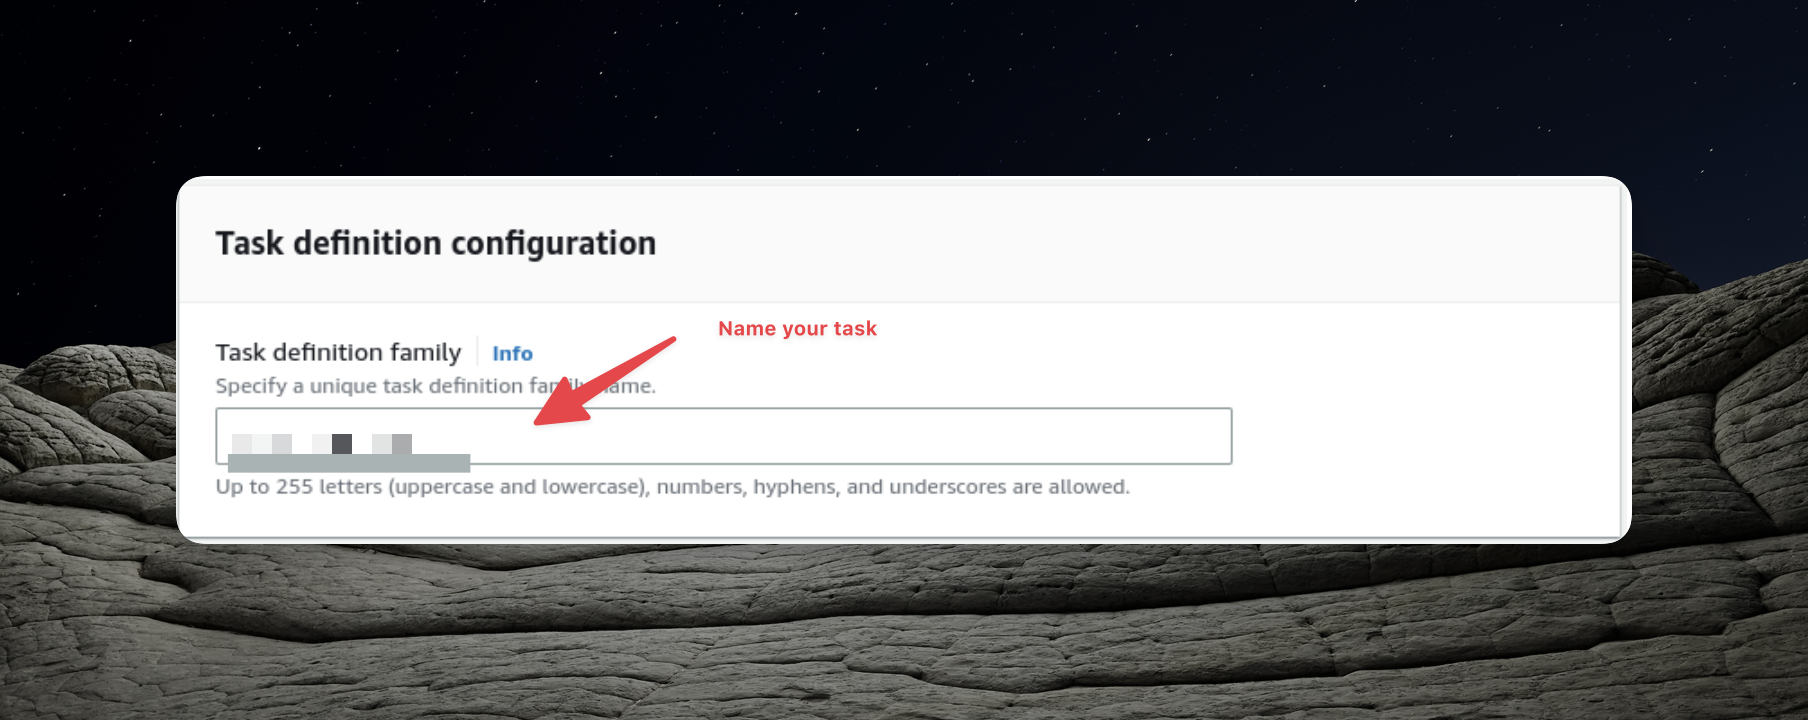
Creating the Task Definition
Within our ECS cluster, we have the flexibility to execute various tasks and to enable this, we must create a task definition. This process closely resembles what we previously accomplished in the prior article.
Once again, our task definition involves configuring it to utilize the URI of the Docker image we've uploaded to the Elastic Container Repository.
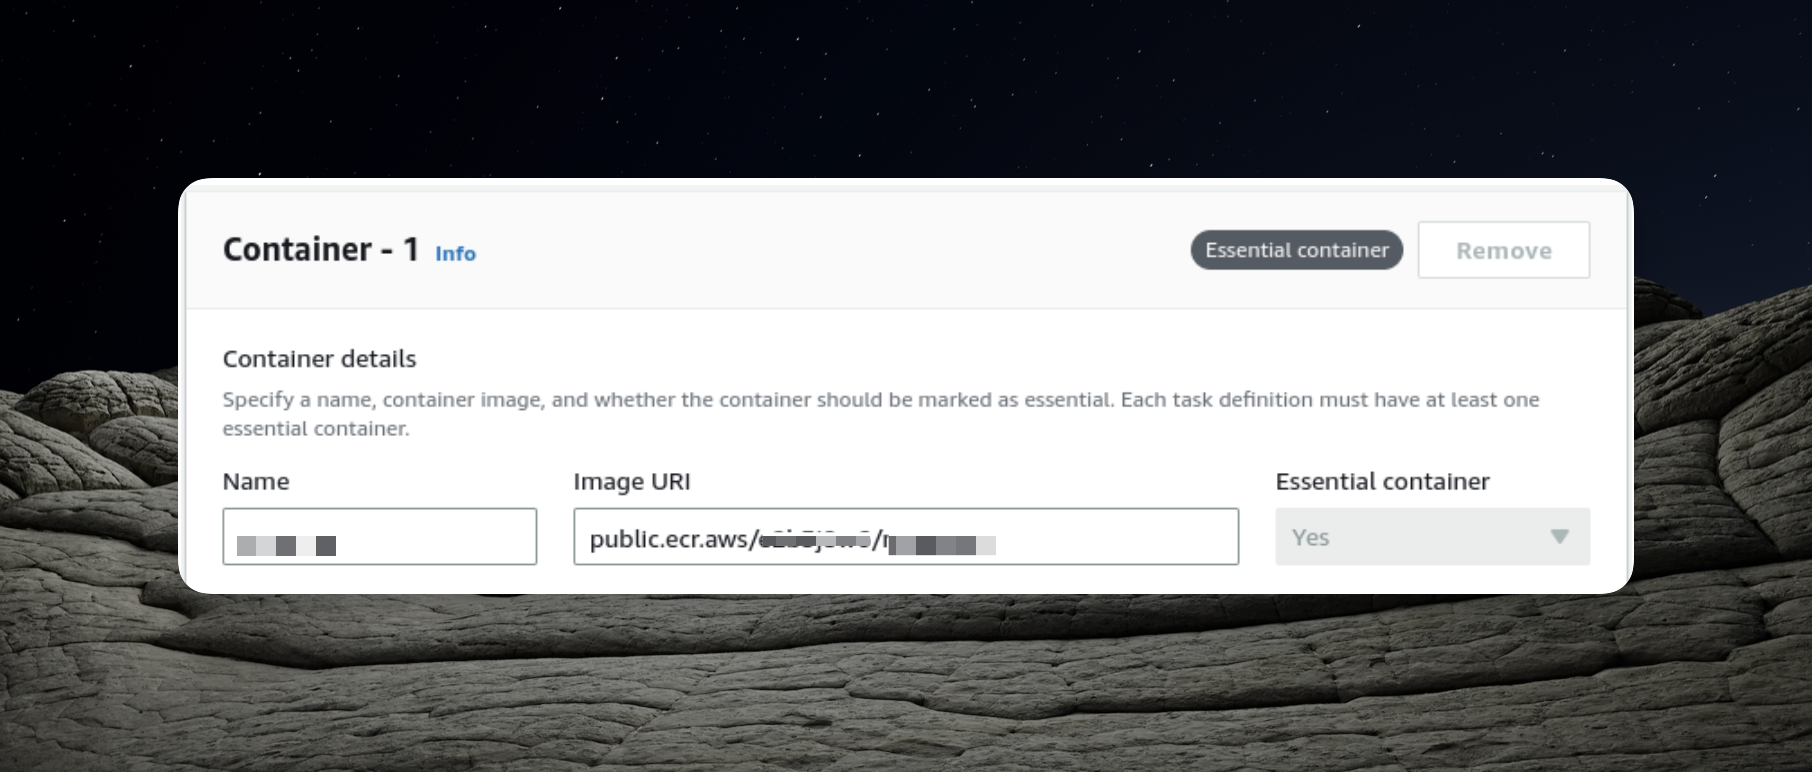
Additionally, we expose port 3000, which is essential for our NestJS application.
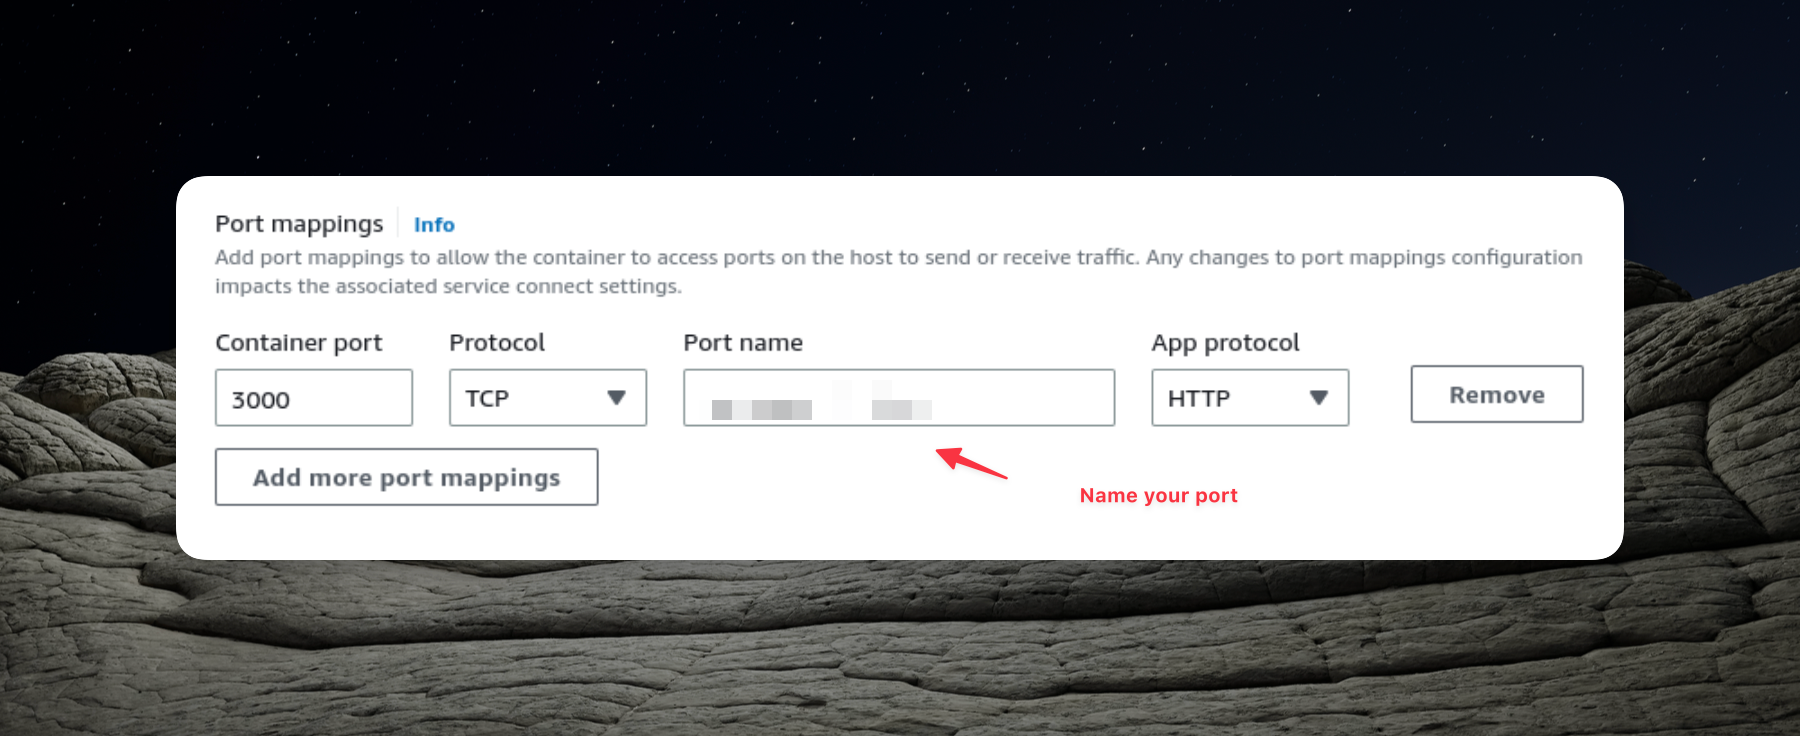
In the preceding part of this series, we configured our task definition with static host port mapping. However, since we intend to use an Application Load Balancer with multiple instances of our application, dynamic port mapping becomes necessary. Consequently,
We won't be altering our task definition to establish static mapping.
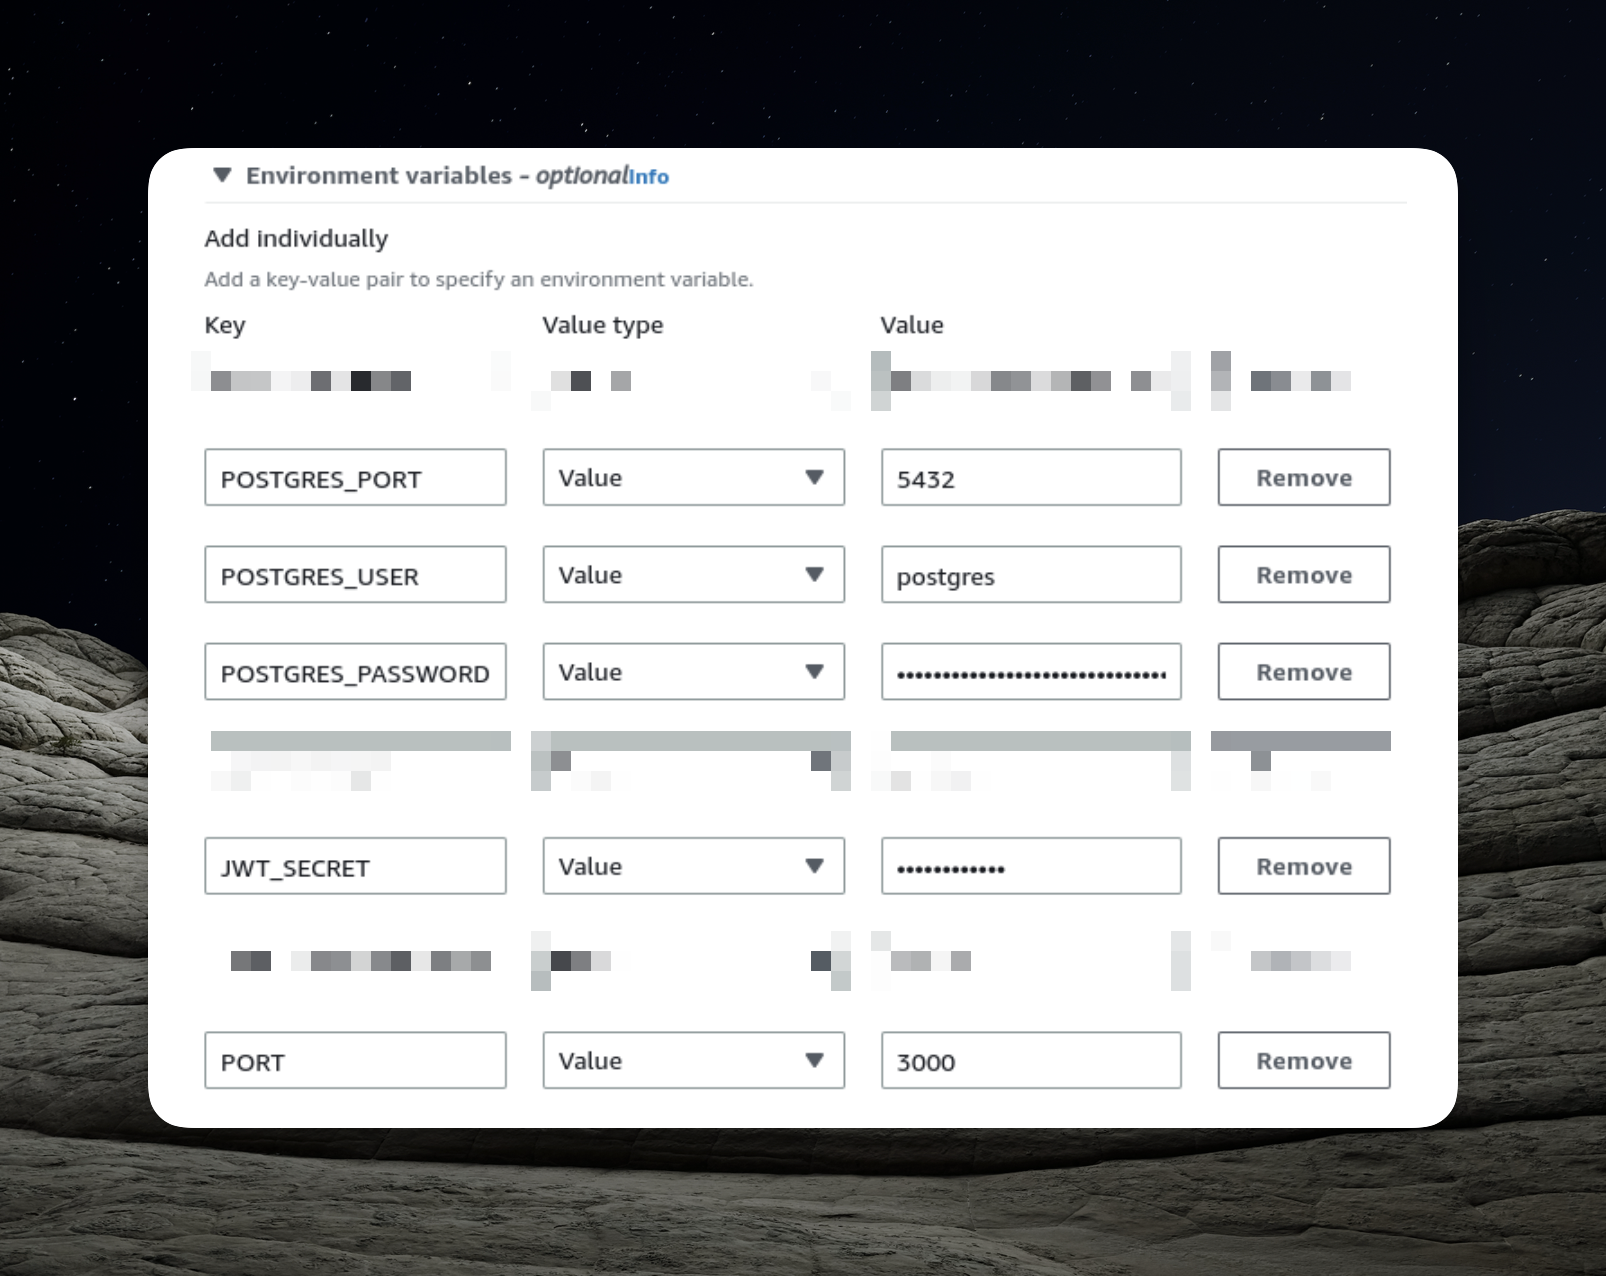
Furthermore, we must supply the required environment variables for our Docker image. The area that necessitates configuration is the environment section.

Running Multiple Instances
Configuring the ECS cluster and the task definition doesn't differ significantly from our previous setup with a single instance of our application. However, running multiple tasks requires a slightly different approach.
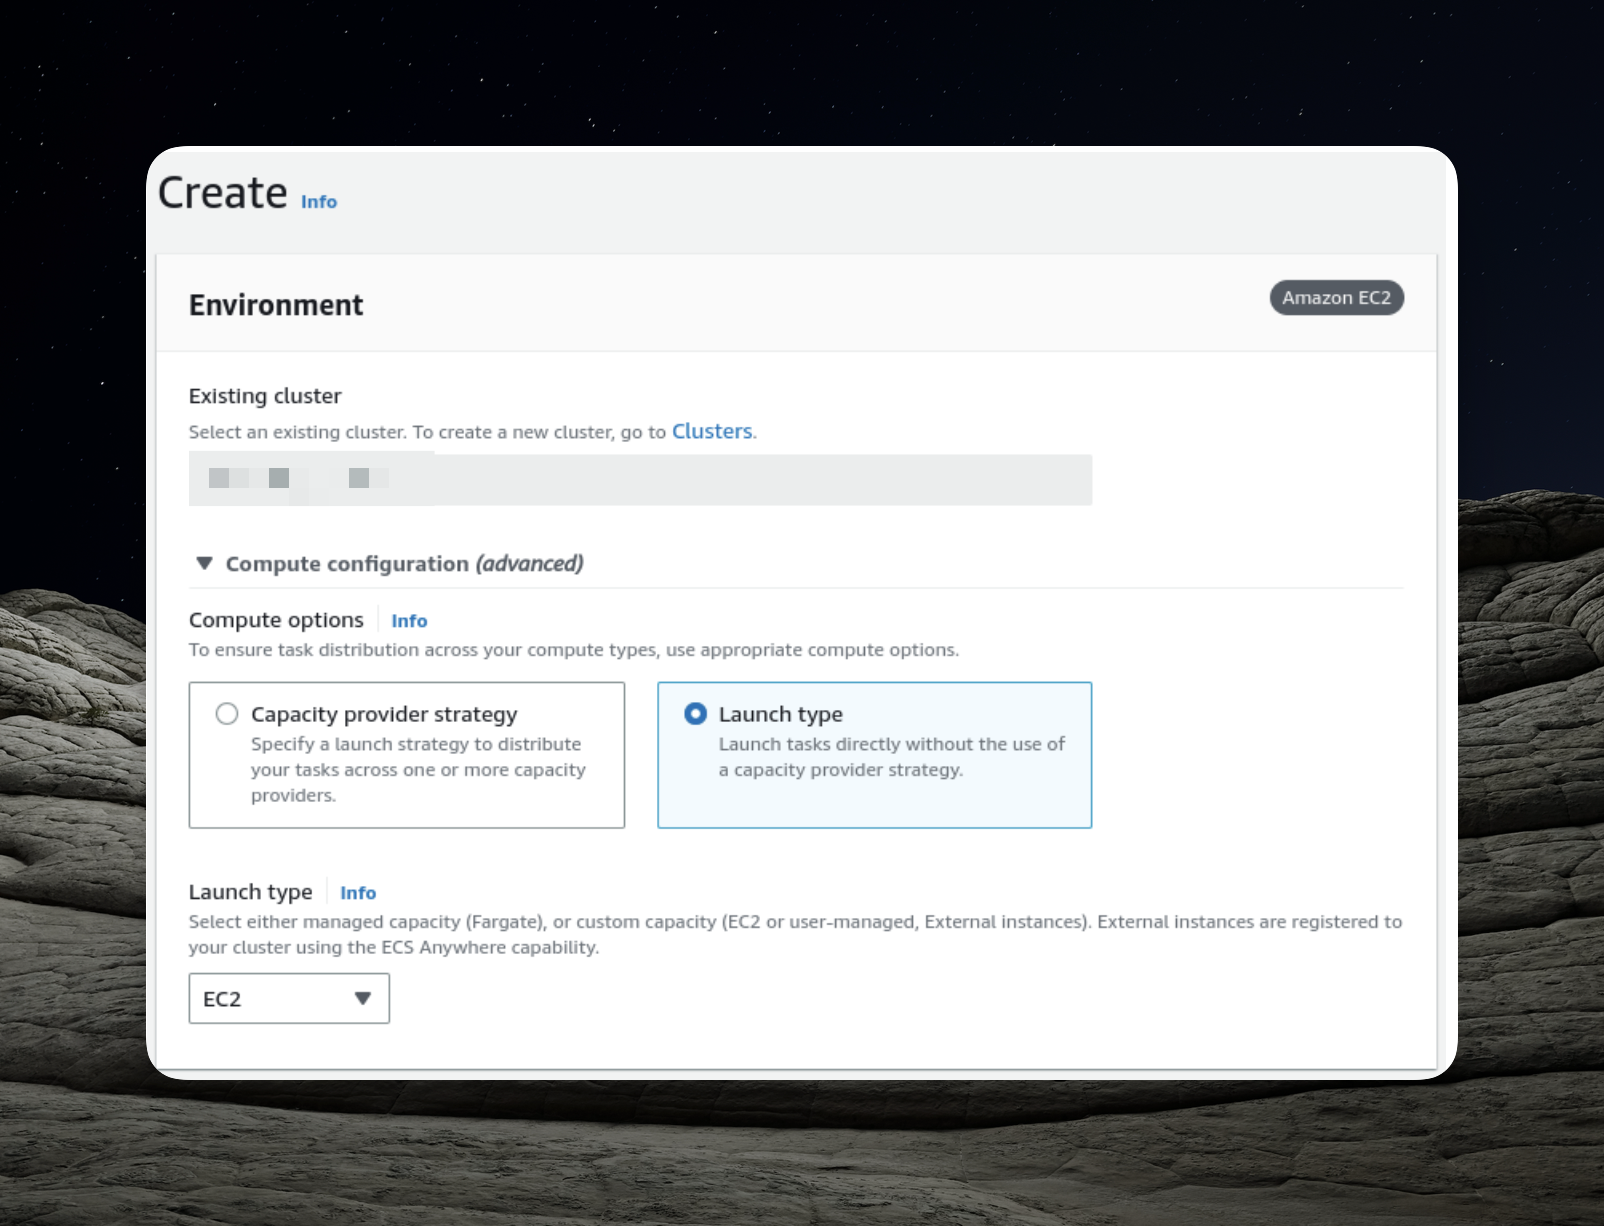
- Creating a Service: Begin by accessing your new cluster and creating a service capable of running multiple tasks. Click the "Create" button to initiate this process.

- Selecting Launch Type: Given that we intend to use EC2 instances within our cluster, it's crucial to select the appropriate launch type.
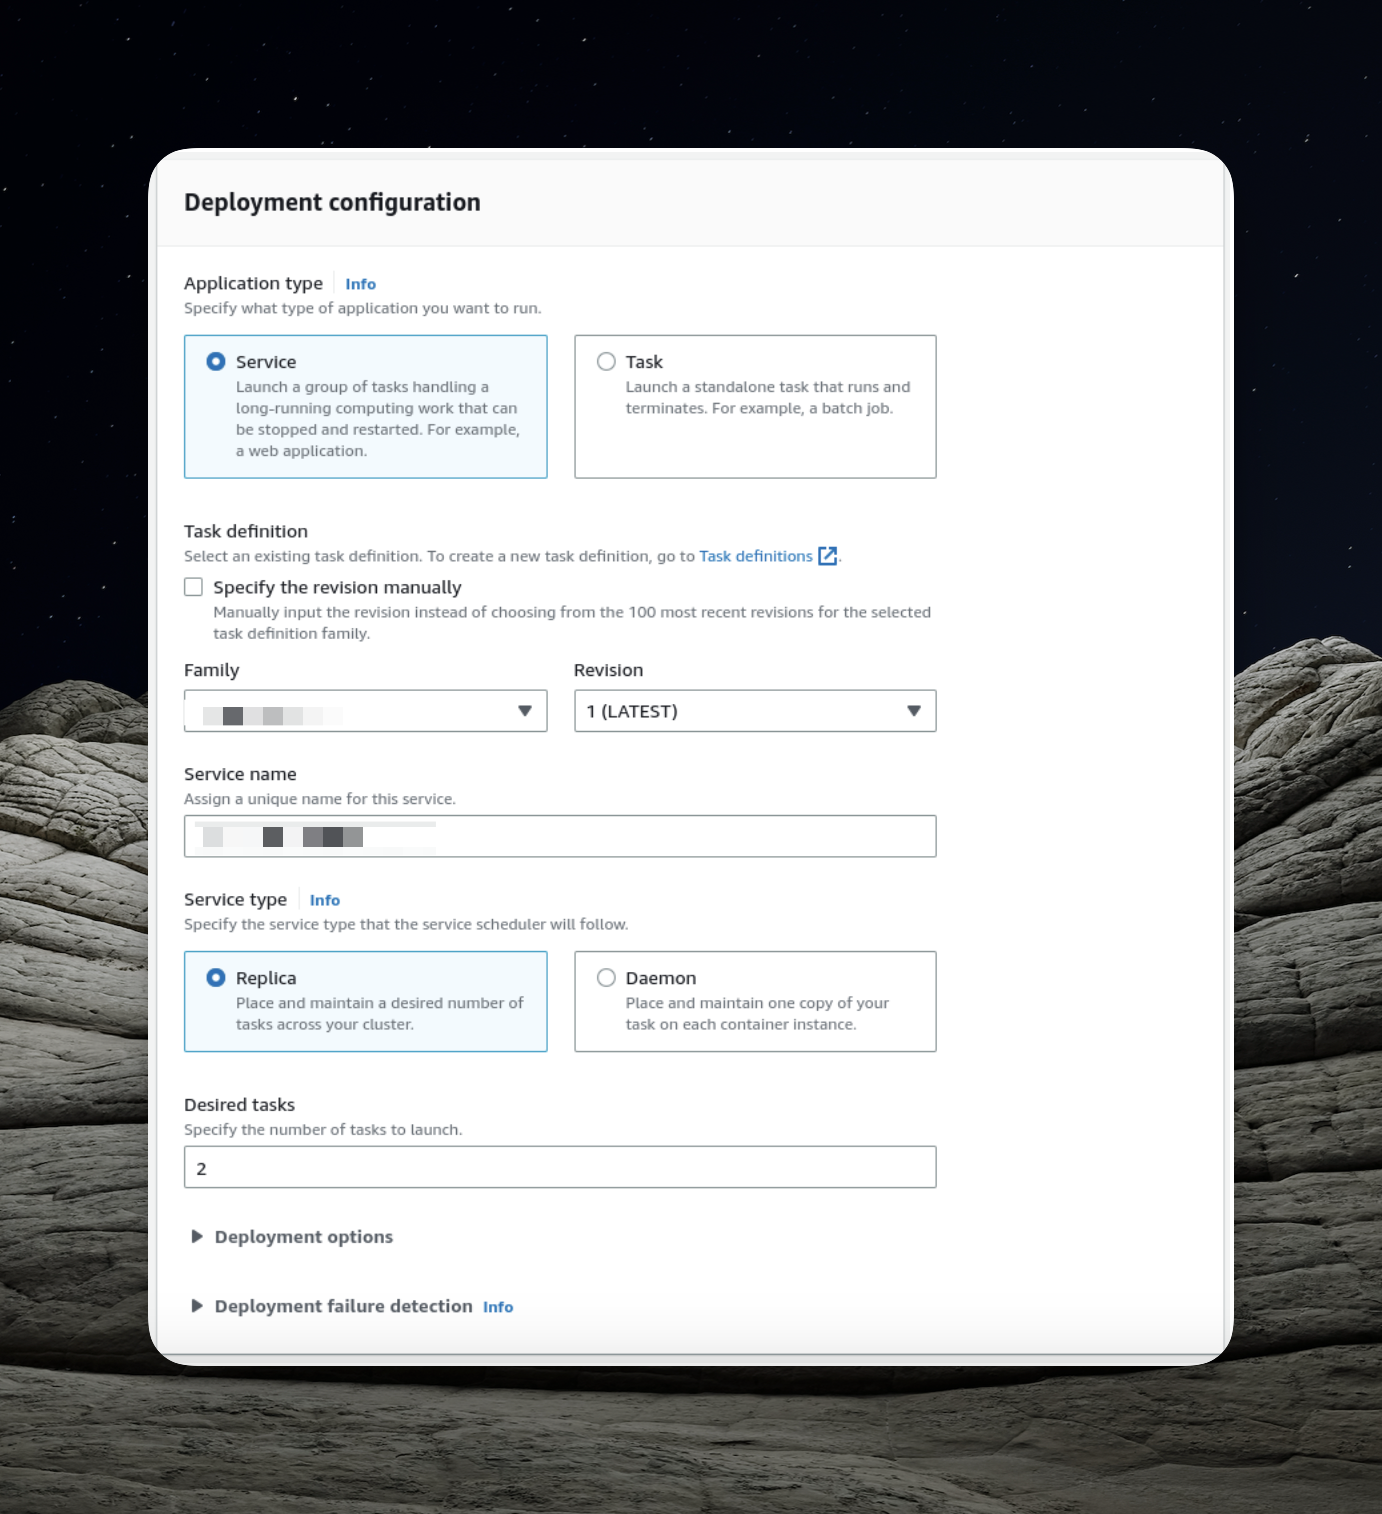
- Choosing Application Type: Opt for the "Service" option, which enables us to launch a group of tasks that can be distributed across our ECS cluster.
Using the "Daemon" service type would mean deploying precisely one task on each active container in our ECS cluster. Instead, we should employ the "Replica" option, allowing AWS to distribute tasks dynamically across the cluster.
- Load Balancing Configuration: Here's where we focus on configuring the load balancer. This presents an opportunity to create a new load balancer, and one of the key elements in its setup is the target group.
In AWS, target groups serve as directives for the load balancer, guiding it on where to route traffic. The load balancer regularly sends requests, known as health checks, to registered targets to verify their functionality.
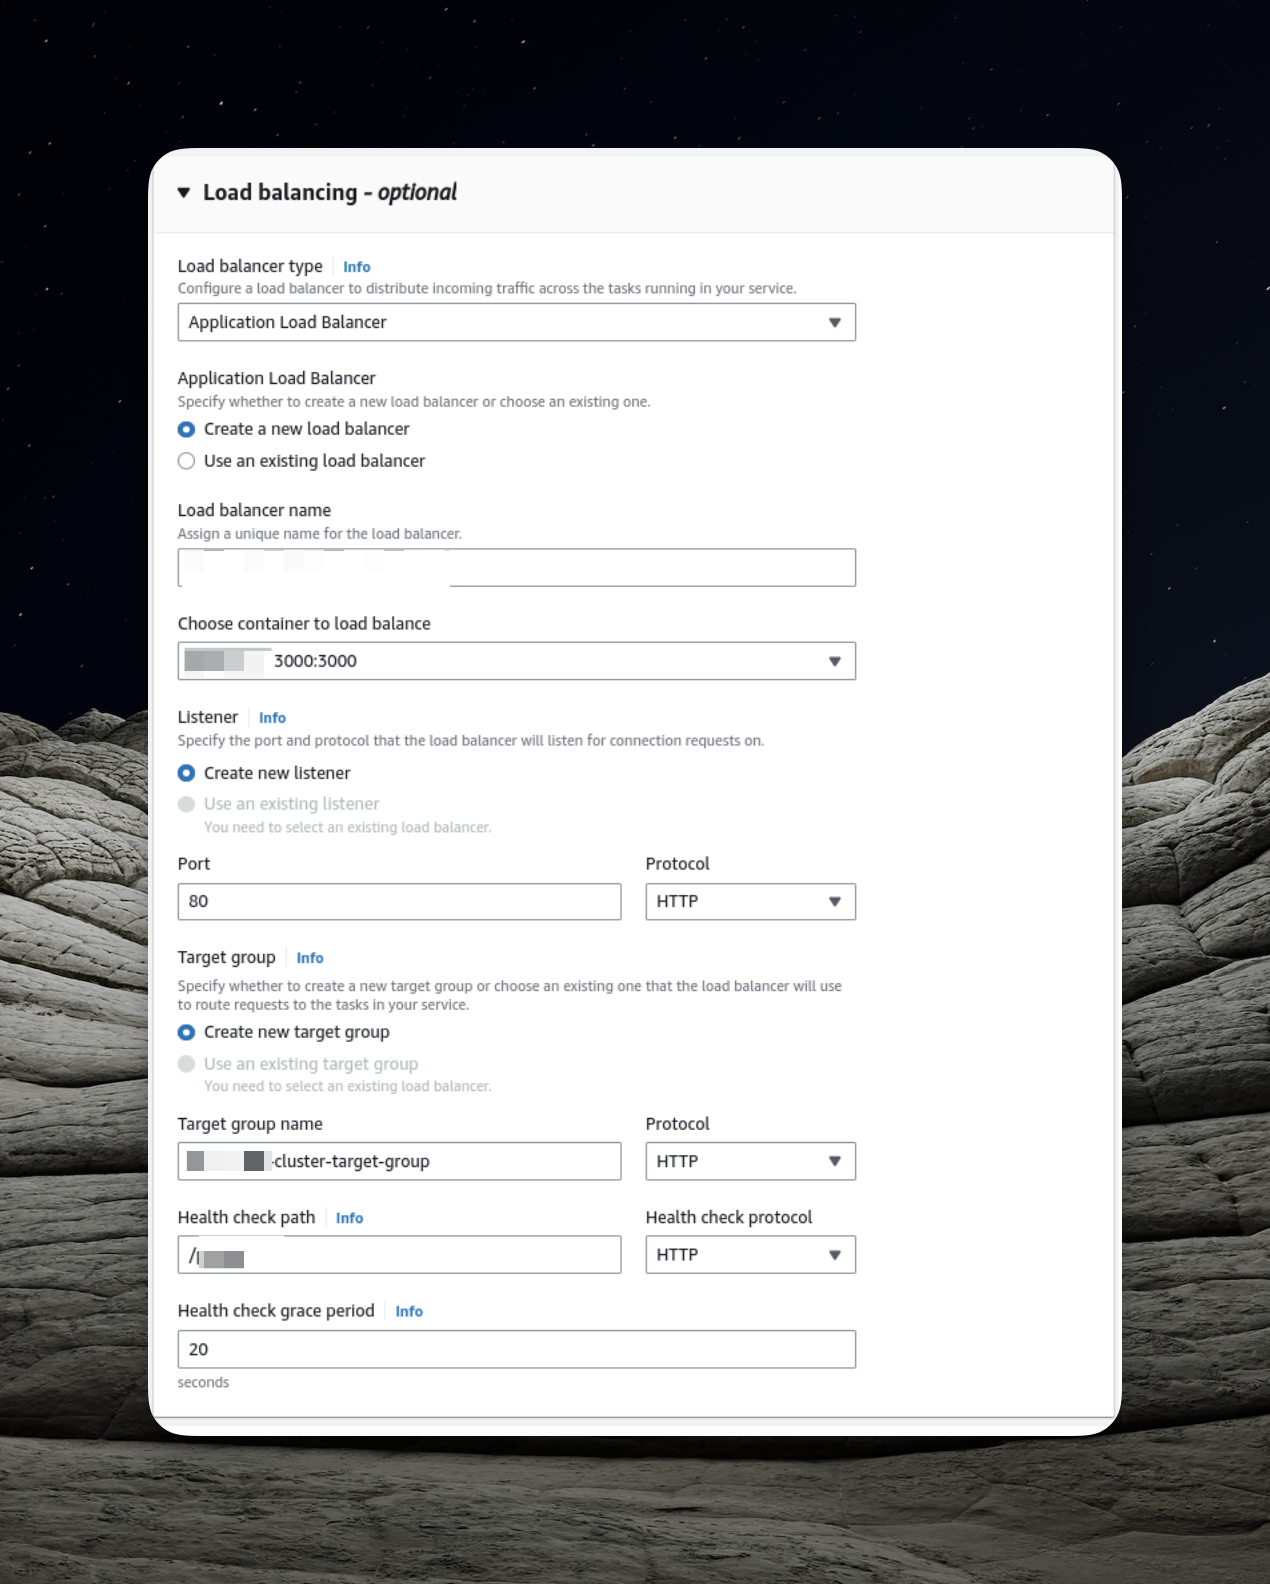
Our NestJS application offers the /
Implementing the Configured Security Groups
Upon running the service as described above, it results in the creation of two EC2 instances. To ensure the correct security configurations, follow these steps:
1. Modifying EC2 Instance Security Configuration:
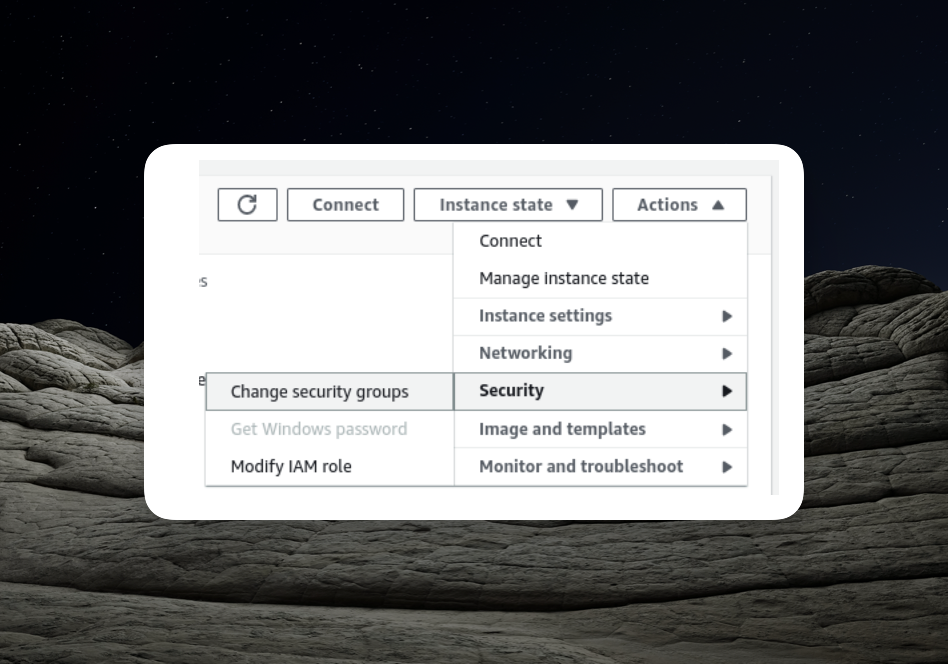
- Access each EC2 instance individually through the EC2 user interface.
- Modify their security configurations to include the "EC2InstanceWithLoadBalancer" security group that was created at the beginning of this article.
- Add the "EC2InstanceWithLoadBalancer" security group to both EC2 instances.

2. Configuring Load Balancer Security:
- Locate your newly created load balancer in the list.
- Modify the load balancer's security configuration by adding the "LoadBalancerGroup."
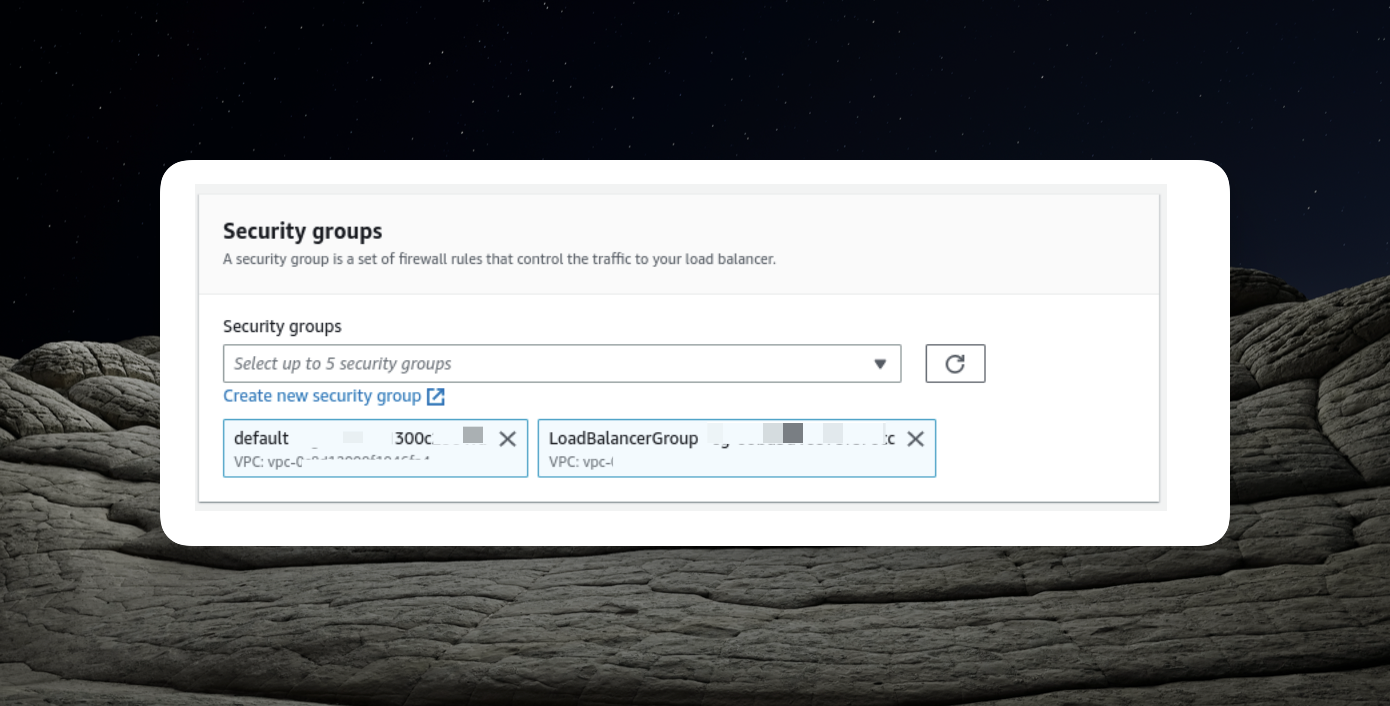
These steps ensure that both your EC2 instances and load balancer have the necessary security groups applied to enable seamless communication and traffic distribution within your ECS cluster.
Accessing Our API
To access our API, follow these steps:
- Locate the Load Balancer Configuration:
Open the configuration page of your load balancer.
- Find the DNS Name:
Look for the DNS name section within the load balancer's configuration.
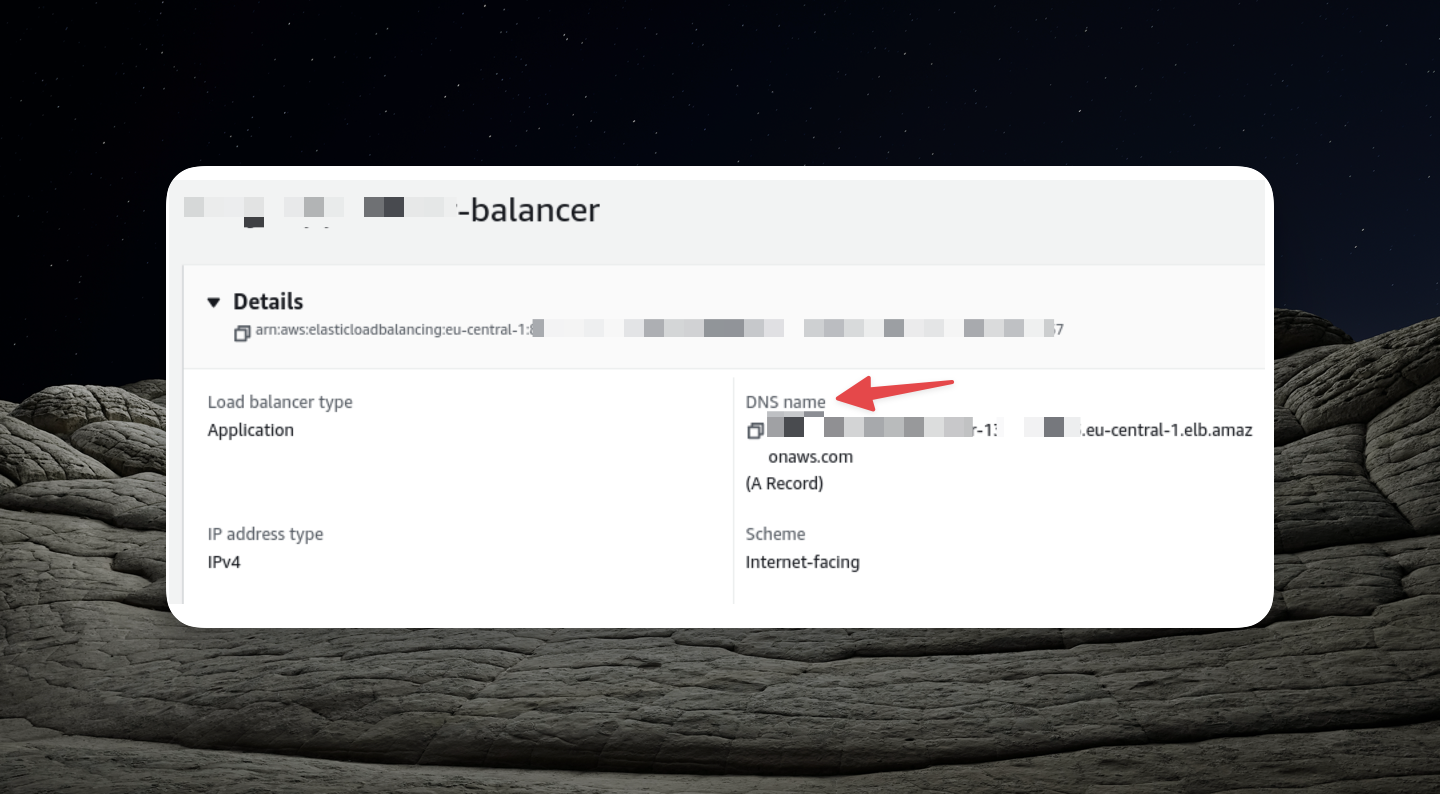
- API URL:
The DNS name you find in the load balancer's configuration is the URL for your API. You can now use this URL to make requests to your API.
Summary
In this article, we successfully deployed multiple instances of our NestJS application on AWS, enhancing our ability to handle incoming traffic effectively by utilizing a load balancer. We also established new security groups to facilitate communication between the load balancer and the EC2 instances.
Horizontal scaling through multiple application instances offers scalability benefits, but it introduces considerations. Instances operate independently, potentially leading to challenges like data integrity when using in-memory caches.
To address the aforementioned challenges and ensure data consistency, we can implement a shared cache among multiple instances. A common solution for this is Redis.
There is much more to uncover regarding deploying NestJS on AWS, so stay tuned for further insights and developments!
LEAVE A COMMENT OR START A DISCUSSION
MORE ARTICLES

2 min read
React 19: They Fixed React Js (Everything you need to know)
React Js Front end architect React Js 19
